Adding and onboarding employees
Bringing people into KAMI: adding them one at a time or in bulk, and getting them invited and activated. Written for HR admins and managers who manage people in My Team.
Offboarding is a process of its own — see Deactivating, terminating and rehiring employees.
Where: My Team › + Add Employee, or Import/Export
You need: the Add Employee right (EMPLOYEE_CENTRAL_CREATE)
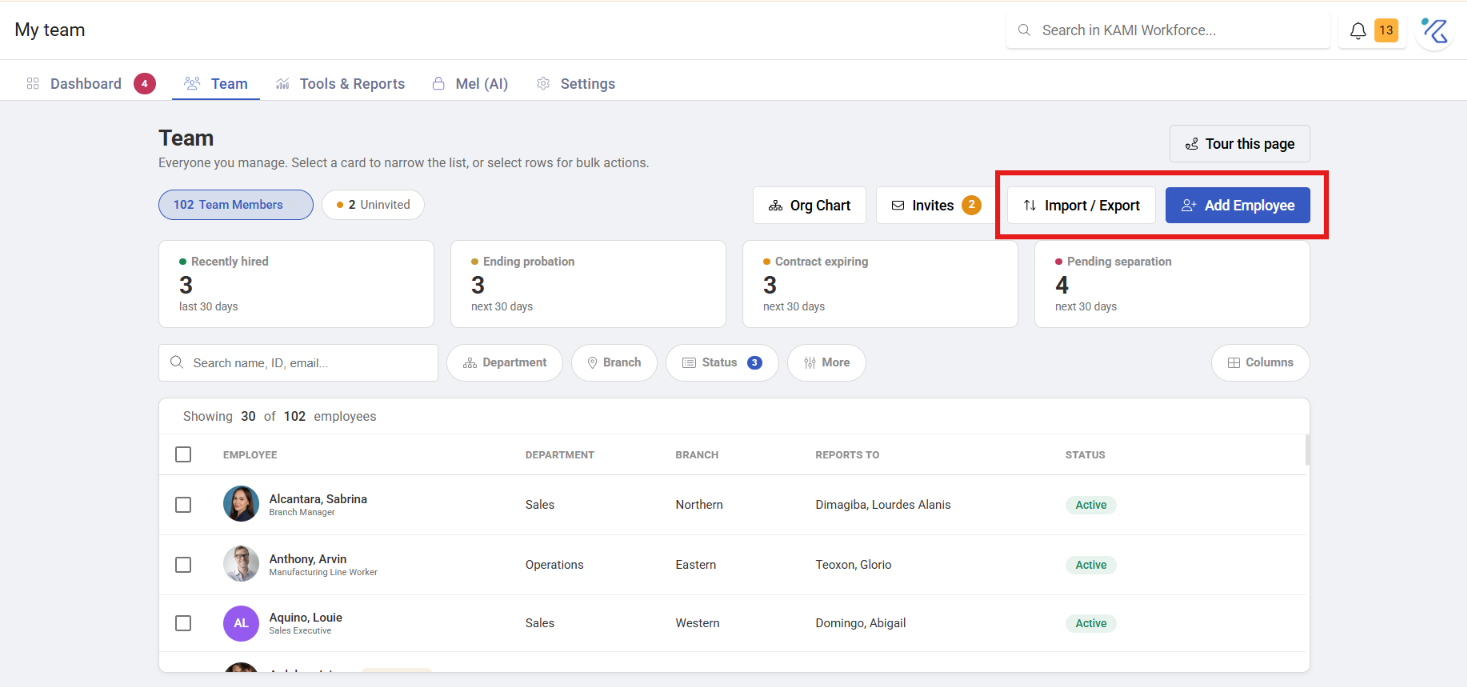
One at a time, or in bulk?
| How many | Use |
|---|---|
| A handful | The Add Employee wizard |
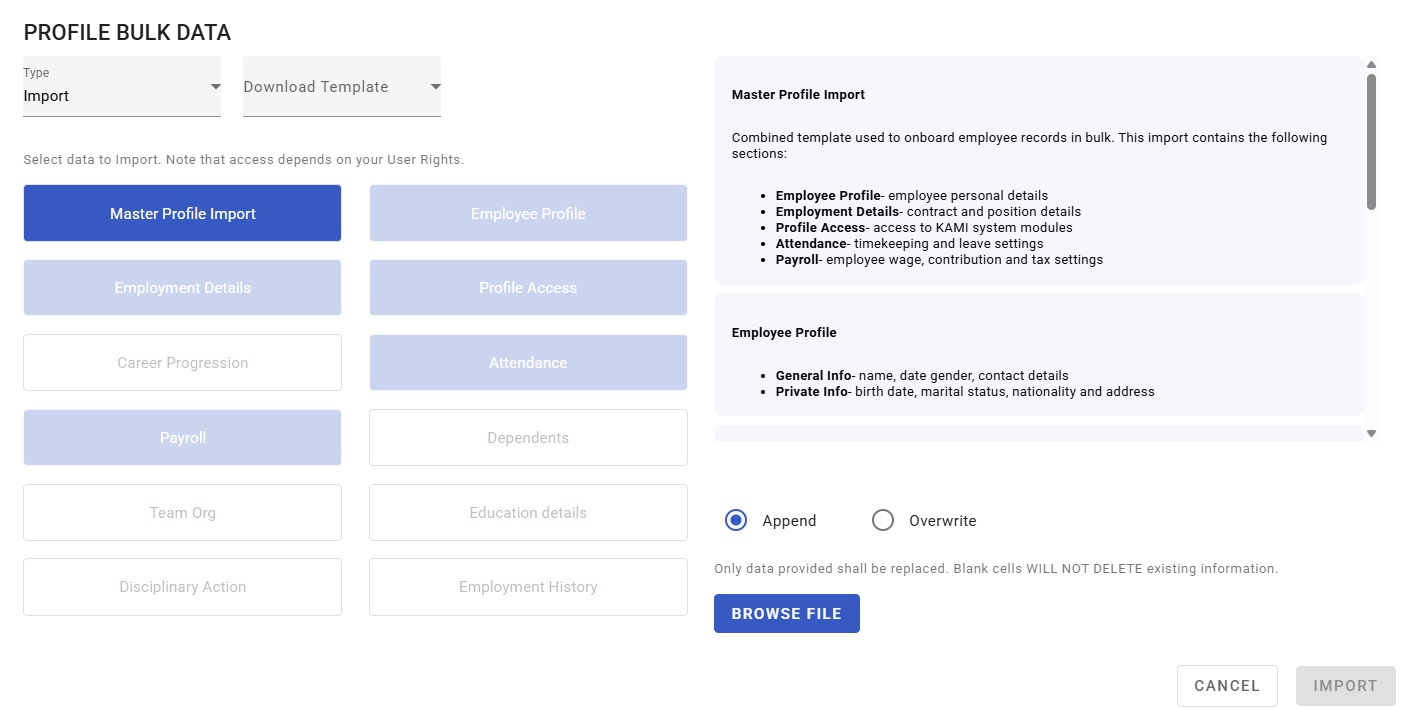
| More than a handful | Bulk import — there is a link to it at the top of the wizard |
| Someone who already exists in another KAMI company | Add as an existing user — they get a company invitation |
Before You Start
Two things are worth settling before the first person, because retrofitting them is far more work:
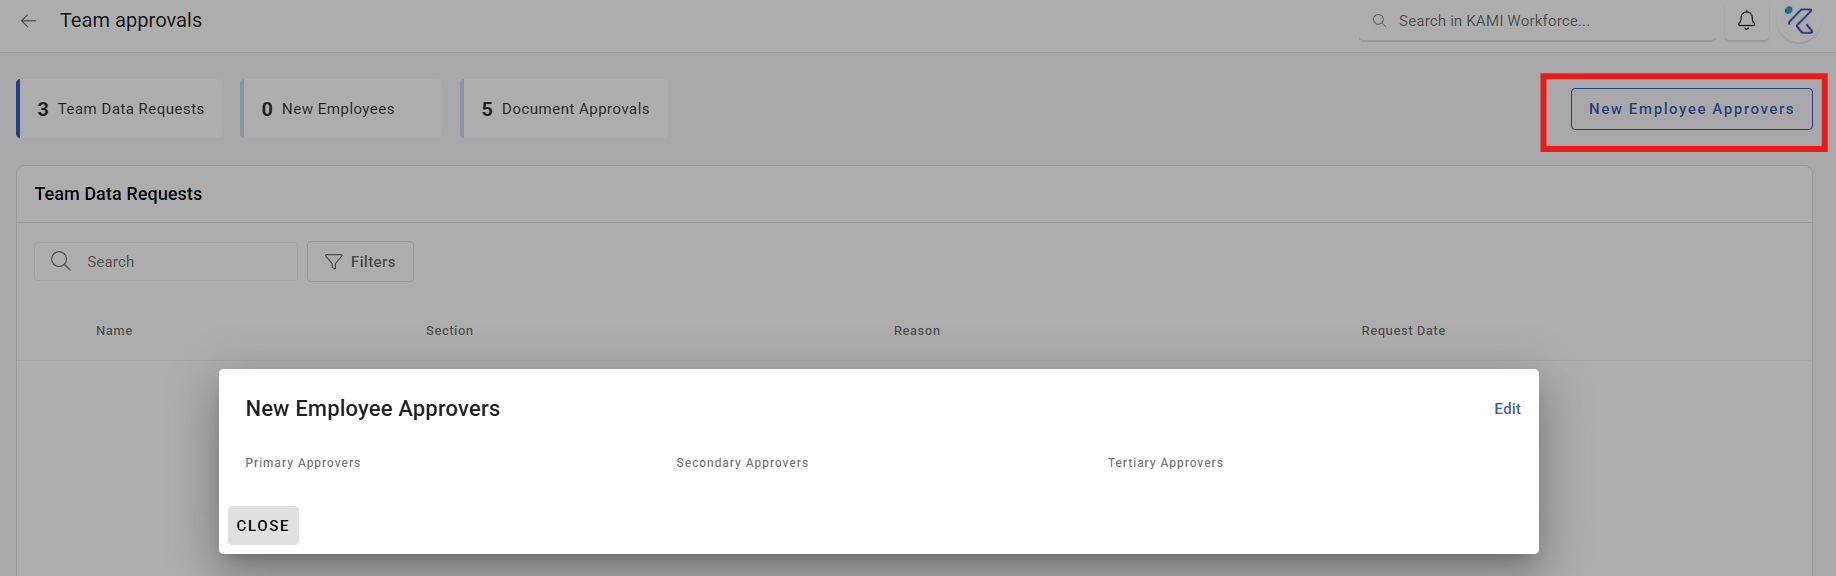
- Your approval workflow. Adding an employee may create an approval request rather than an instant profile. Set New Employee Approvers first, or profiles will sit as Unapproved with nobody to clear them.
- Profile Automations, if you want placement to set groups, approvers and schedules automatically. Without them you set each by hand for every joiner.
Your scope also limits who you can add: unless you have All Employees access, you can only add people inside your own departments or branches.
The wizard
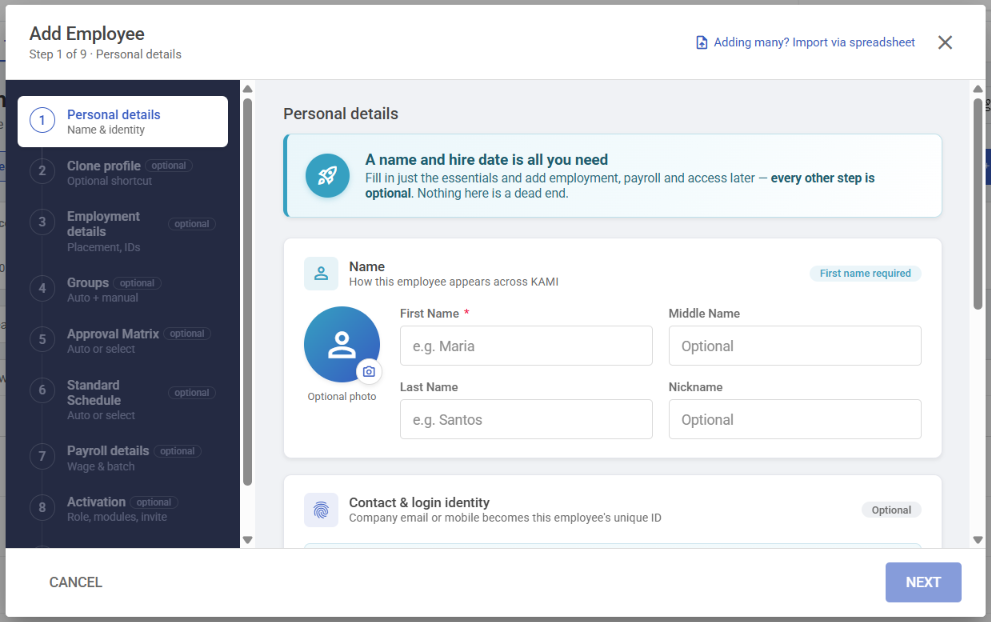
Nine steps, but only two things are actually required: a First Name and a Hire Date. Everything else is optional and can be completed later — nothing in the wizard is a dead end.
| Step | For | Required? |
|---|---|---|
| 1. Personal details | Name, contact, hire date | First name + hire date only |
| 2. Clone profile | Copy an existing employee's setup | Optional shortcut |
| 3. Employment details | Department, position, branch, probation, contract | Optional |
| 4. Groups | Role/profile groups | Often auto-set |
| 5. Approval Matrix | Who approves this person's requests | Often auto-set |
| 6. Standard Schedule | Working schedule | Often auto-set |
| 7. Payroll details | Wage, batch cycle, payment method | Optional |
| 8. Activation | Role, modules, send invite | — |
| 9. Review & create | Confirm and add | — |
Finish with Add employee, or Save & add another to start a fresh one immediately.
Steps 4, 5 and 6 may fill themselves in
Where a Profile Automation matches the placement you gave in step 3, KAMI applies the groups, approval matrix and schedule for you and shows them as Auto-assigned — locked, so nobody can override the rule by accident. You can still add extra groups on top.
Where no automation matches, the step says so and asks you to choose. That message is worth noticing — it usually means a department or branch has no automation set up yet.
Step 8 decides whether they can log in
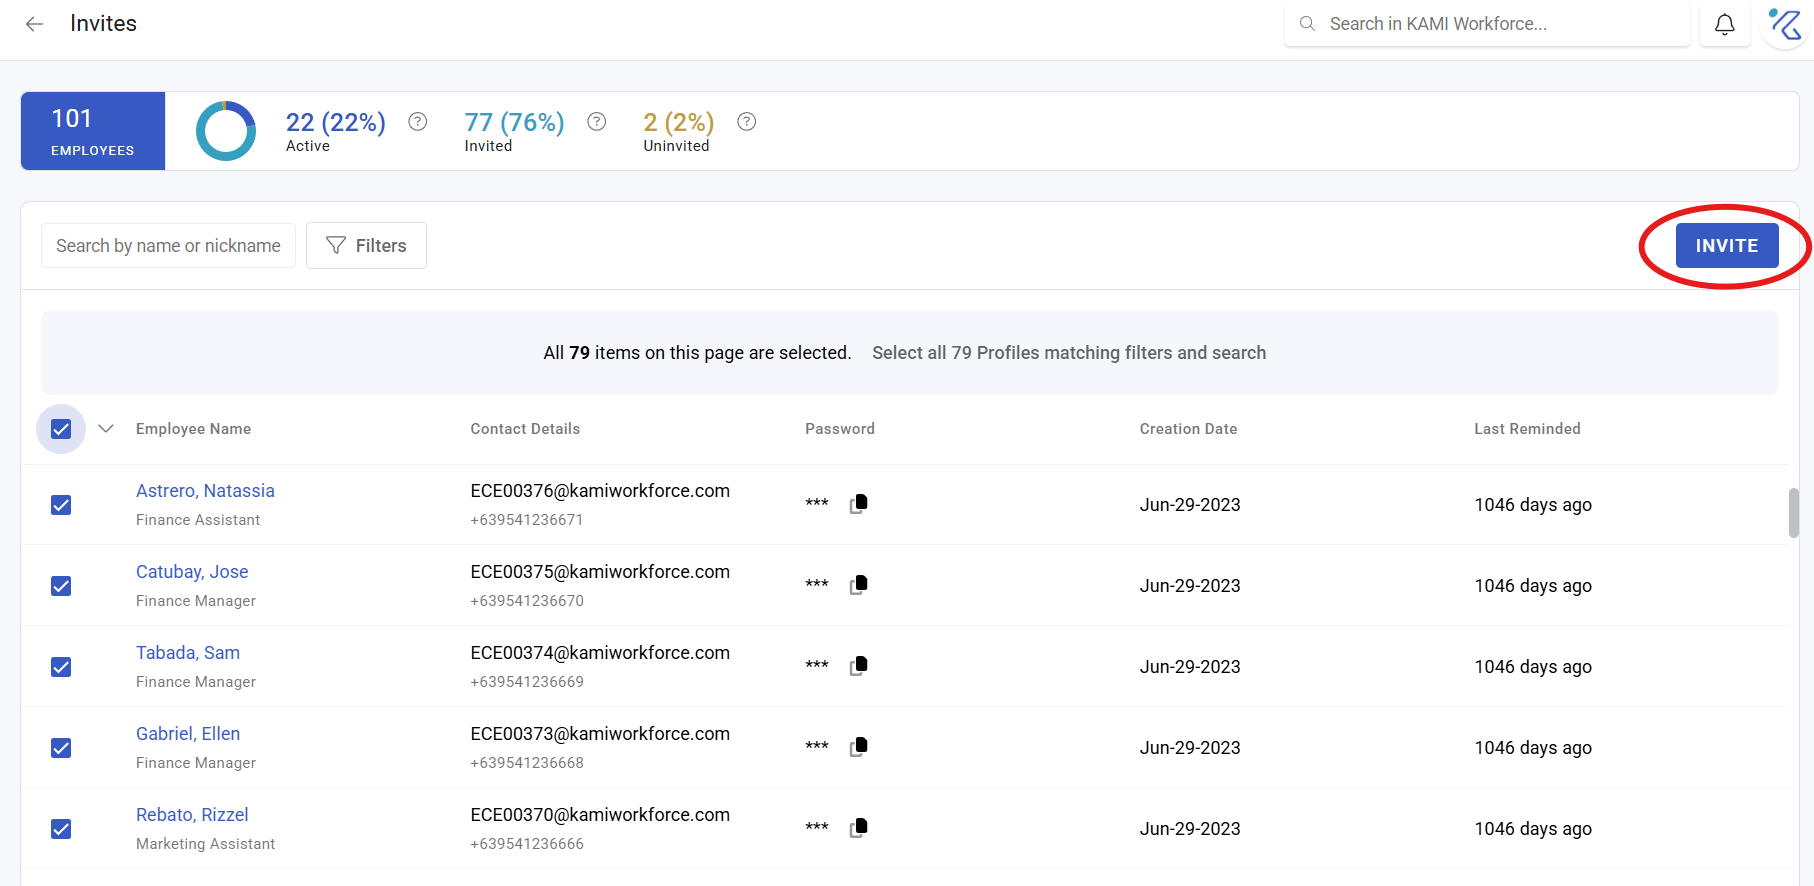
The Send activation invite now toggle is off by default, and the employee stays Uninvited until you turn it on. Leave it off unless the profile is genuinely finished — someone who logs in to a half-built profile sees the gaps. You can invite them at any time afterwards.
Cloning (step 2)
If the new hire is set up like someone who already exists, use Clone profile: their employment and pay structure copy across — wage period, payment method, placement — and you adjust the personal details.
Actual wage amounts are never cloned. Only the structure copies; you enter the wage in the Payroll step. That is deliberate — it stops one person's salary silently becoming another's.
If you do not have their email yet
You can create the employee without an email or mobile. KAMI generates a placeholder company email so the profile can be created, and you add the real address later. They cannot be invited to log in until a real email or mobile is on file.
What Happens Next
- New employees may need approval. Depending on your setup, adding one creates an approval request and the person sits as Unapproved — hidden from the main list — until approved.
- Invites send an email (and an SMS, where the person has a mobile and your company has SMS enabled) with an activation link.
- Activating an employee triggers a confirmation email to them.
- Adding an employee auto-links them to active announcements, sets their leave policy start date to their hire date, and — if they already exist in another KAMI company — sends a company invitation.
Tips
- Add with just a name and hire date if that is all you have. Getting the person into the system early beats waiting for complete information; complete the rest before their first payroll run.
- Set up automations before a bulk intake. Forty joiners with automations is a spreadsheet; forty without is forty sets of manual settings.
- Invite in a batch once profiles are checked, rather than as you go. It gives you one moment to verify rather than forty.
- Check the Unapproved filter after adding. If approvals are on, that is where your new people are.
Rules and things to watch
- Overwrite import deletes data. In bulk import, Overwrite treats a blank cell as "delete this value" — see Bulk data import and export.
- Employee IDs must be unique within a company. Unset, it defaults to the system-generated ID.
- A declined new-employee request deletes the draft profile, freeing its email and phone for re-use.
- Country note: for Indonesia companies, new employees default to a fixed-monthly-days wage basis and an Indonesian tax code. This is automatic.
- Invites can only be re-sent to the same person once every 20 hours.
Troubleshooting / FAQ
Q: I added an employee but cannot find them. They are Unapproved or Deactivated — both hidden by the default list view. Open Filters, or check Team Approvals › New Employees.
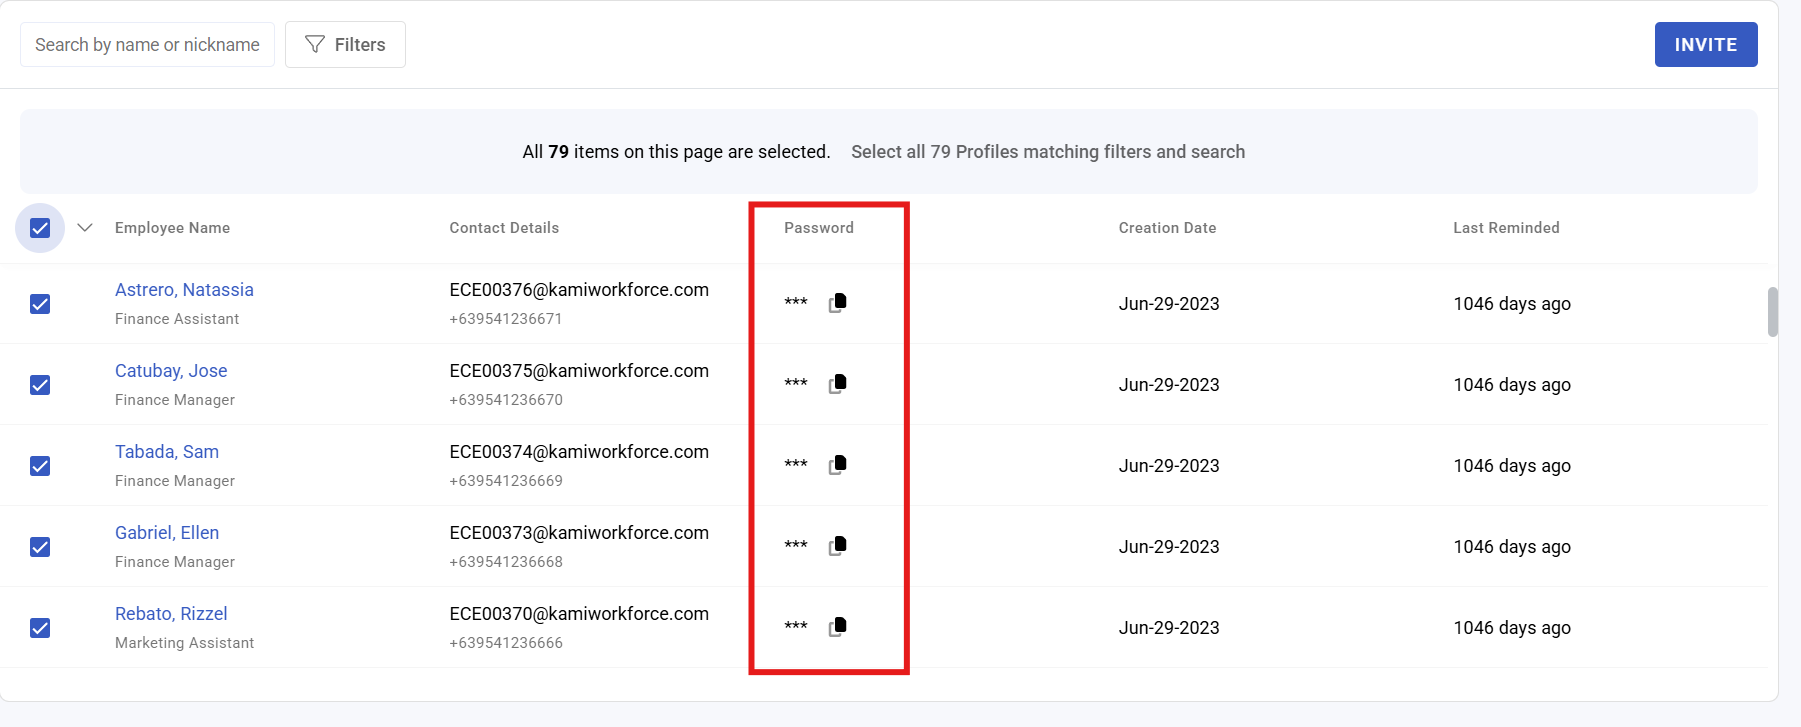
Q: I re-sent an invite and they say nothing arrived. Invites can only be re-sent once every 20 hours. Wait, or copy the generated password from the invites screen and hand it over directly.
Q: The Groups and Schedule steps are locked. A Profile Automation matched their placement and applied them. That is intended.
Screenshots
These screenshots came from our previous help centre and may show an earlier version of the interface.